Chimpanzee like motor skills …….Check
At least two brains cells to rub together …… check
if you can say “check” to the two requirements above: then you are ready for EXTREME CLEANING , CLEANING ,CLEANING , CLEANING (please imagine a 5 second fade out on “cleaning”)!
Obsessive compulsive way to clean 4 channel modules.
1With both hands grab and pinch up the scribble strip (you may use a plastic putty knife to get it started then use your fingers the rest of the way) It has cotton felt material so it doesn’t scrape metal to metal. There are no screws holding the scribble strip in place.
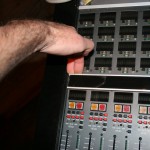

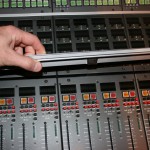
Work your way across the scribble strip gradually pulling up each section across the console, it will bend a little but don’t over do it. Lift scribble strip out of the console.
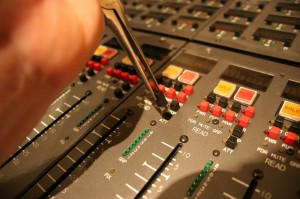 2Using needle nose pliers ( i like the longer ones) grasp each of the little buttons (or button covers i guess would be a technically more accurate description) lightly with just enough force to hold it and without twisting, pull straight up and they come out easily.
I do not remove or mess with the “Mute” and “Solo” buttons as i haven’t encountered any problems with them as of yet. You can remove the little buttons with your fingers also but i do not recommend that.
3Remove all metallized fader knobs by wiggling your thumb and forefinger underneath until it pops off the metal fader/slider.
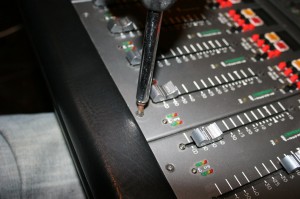
4Remove the top and bottom larger screws that hold the four channel module onto the control surface.
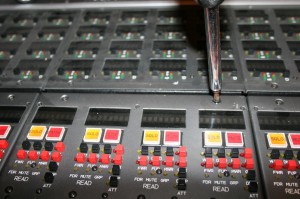
5Put an old t shirt of a band that went #1 in Costa Rica that you tracked on vacation (or any t-shirt) next to the module you are about to take out. Flip the module over to your left with the bottom facing up, you will notice there are three ribbons on the top and two on the bottom. disconnect them by pressing on the little black handles that raises the connecter out. Kind of a no Brainer, just remember where the ribbon connectors go back in.
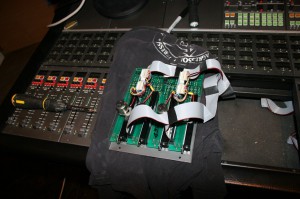
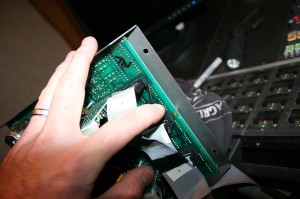
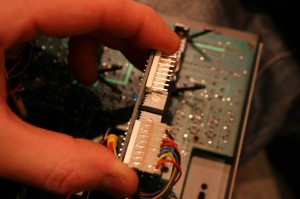 6Disconnect the fader connectors, note that top connecter is the right fader, bottom is the left and you wont get confused and make sure you are firmly gripping the PCB board with your fingers on your left hand as you you rock the connecter back and forth gently (but firmly .) with your right.
Do not create any undue stress or twisting on the PCB board.
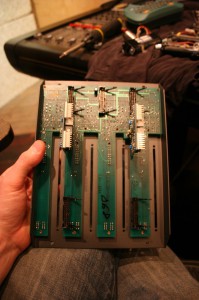
7Flipping the module back over, on a soft surface or your lap, remove the two screws that hold each fader in place, taking care that they don’t fall or get damaged. heres what you have now.
8Remove all other screws on top of module. Note the top three screws are flush mount (flat), the others are all round head (only two types of screws).
You can now liberally remove all remaining mounting screws while having the module placed in your lap or on a soft surface, this will naturally support the electronics below as the screws release their grip on the PCB board.
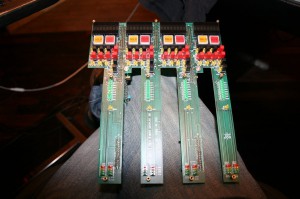 Important… once ALL the screws are out , check that all the little lights and buttons come out straight without bending or displacing them, its easy… just be careful while you do this.
(it’s your baby…. of course you’ll be careful)
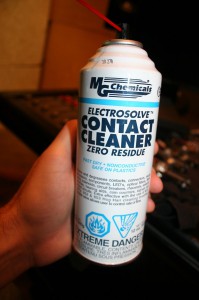 9Get your “Zero residue contact cleaner” ready… you know…the one labeled EXTREME DANGER!
Adjust the spray can to the lowest setting (low) if it has one… it still sprays with quite a bit of force. Placing the straw directly into the crevice of the switch I blast the spray for less than a second and then use the same straw to immediately depress the switch vigorously. If you keep a little bend on the straw as you quickly activate the switch over and over again it becomes a very easy and quick method. I used to use a pencil eraser to do this (the small ones on the end of a regular pencil) but the contact cleaner evaporates so quickly there is no real time to change tools. I use my left hand and a little flexing of the straw to press down on the switches. As you clean you will feel the switch get tighter feeling and will have a snapper click sound to it. Sometimes it takes a couple little blasts of cleaner from a few different angles to get the dirty little switches clean while working the product in there.
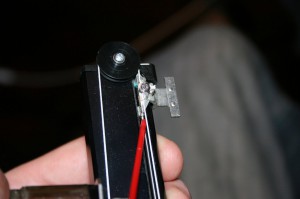
10The faders need blasts of Zero residue contact cleaner as well along the shiny chrome/polished metal rails (don’t forget to do both sides of each fader rail) and into the bushings that ride on the rails. Work the fader back and forth at differing sections of the fader to work grime and grit (ok…. hopefully theres no grit in there) out as you do short blasts of cleaner. I have some faders that are more smooth than others even after cleaning, i believe this is “normal”
A Lazy Tech (who was fired) Way to clean 4 channel modules.
1Remove scribble strip as described above (complaining how things used to be better in the 80′s/90′s et……)
2With needle nose pliers remove the small button covers. then blast Zero residue contact cleaner into (really its mostly on top the buttons doing it this way but some will trickle down to the switch) the switch, use the same straw to immediately depress the buttons vigorously.
3Shoot the contact cleaner into the very small hole on top of the fader dust guard and hope that makes all you problems disappear!

Thats it!
Shawn Sullivan


Excellent informative post!
A question though : wouldn't it be wise to clean the moving part (i mean the fader rail) with some other cleaner (one optimized for moving parts) ?
Thank you sir! That is a great question. I'm kind of paranoid of using any thing that attracts dust. Fader lube and the like does attract a little dust. Although if you are cleaning your console periodically, it shouldnt matter. My faders feel nice and smooth and there is no light oil on there to suck in the little dust bunnies.
Gwyn should weigh in on this since he's the real tech here.... not me. Also anyone else have some better ways (or alternate ways) of cleaning the fader/module should weigh in please.
All my little buttons work now! Whooo Hoooo!
Now that is great news!
I'm sure most of us think these switches go dead quickly, whereas you seem to have just prooved that they just need to be cleaned!
yes, i've had a couple that really were very dirty and i had to spray them from all four angles of the switch will activating them really fast to get them to come back to life. They are as good as any of the other switches now. also i've been doing some of this while console is on becuase i am doing a huge mix right now and cant keep powering this thing on and off, and it still is working great shooting from the top of the switch and blasting all four sides while the console is running.
Just wanted to chime in and thank you for the course!
Tiny little switches with a small contact surface, relatively big dust and dirt particles, they need to be cleaned more often than a larger switch because of the physical realities involved i believe.
Ditto!